Red, White and Blue Mantel


I've been working on it for a few days and today I finally got my mantel all ready for the 4th of July.


  I love the colors so much I'll probably leave it up long after the holiday is over.


I started with my USA sign right in the center.  I also filled a coke bottle with some stars on a stick and used this cute little chalkboard arrow.  


to the right I put some handmade pinwheels in a painted mason jar, 


and to the left is the wooden flag I made last year.  


My daughter and I made this bunting that hangs along the antique door knobs on the shelf.  


All dressed up and ready to roll for the Holiday!


Eiffel Tower Wall Shelves for Teen/Tween Girl Bedroom

Are you looking for a way to add storage to a room with style?  Take a look at these Eiffel Tower Wall Shelves that are perfect for a tween/teen girl room!

                                                                                                                             updated 9-19

Eiffel Tower wall shelves for Teen or Tween Girl Paris themed bedroom


Summer Linky party with Design Dazzle

Did you catch my post yesterday?  I did a guest post for Design Dazzle.  Now today I get to participate in a big linky party with Design Dazzle and a bunch of other amazing ladies.  And you get to participate too!  If you link up your posts regarding anything to do with kids and summer, it will automatically appear on all of our blogs.  How cool is that!!


  summer camp logos with pink web


summer-camp-banner-link-party


To continue the Summer Camp fun, some of the bloggers participating in the 2013 Design Dazzle Summer Camp series are hosting a HUGE Summer Camp link party! The link party will run through July 26th and will include all of this year's projects, but we want YOU to link up your summer fun activities as well, so we can ALL get some great new ideas for the upcoming summer months! Feel free to link up any projects, ideas, crafts, etc. that you have created which involve Summer Fun & Kids. We want new ideas as well as ideas from years past...the more the better! All ideas added to our Summer Camp link party will automatically appear on all of the wonderful participating blogs seen below:


We would love for you to follow all of us on our blogs and on Pinterest! Simply click on the link below to find these awesome bloggers' sites and Pinterest boards for even more fabulous inspiration!


Be sure to visit all of our previous Summer Camp ideas as well by clicking the banner below!

summer-camp-banner-wide40


Guest Post on Design Dazzle

I'm so excited!  I'm guest posting over at Design Dazzle today.

Photobucket

I had the opportunity to meet Toni at Snap.  I've been a fan of her blog for a while so when she introduced herself to me, I was a little star struck.  Not only is she talented and have an amazing blog, she's super gorgeous too!!

So when she asked me to be a part of her Summer Camp Series, I almost died!  It's such an honor to me!  I love when the big people of the blogging world help the little people, like me!

Go and check it out.  My cute kids and I did a fun project to help collect summer memories!

Red Chevron burlap wreath and small front porch update

We updated our front porch, which includes a new red chevron burlap wreath.


It was SSTM.  

I figure since I always say "Super Simple To Make" with every project I do, I ought to come up with my own acronym.  


Here are the supplies I used:
-wire edged burlap chevron ribbon from Hobby Lobby (on sale 1/2 off)
-metal wreath form
-wire (I started with this raffia wrapped wire, but then changed to regular thin gauge wire)
-wire cutters and scissors.  


I didn't take step by step photos of this part- but all I did was make a loop of ribbon and wire it to the wreath form.  I did this over and over until the wreath form was completely covered.  Since the ribbon is wire edged I could move the loops around to make it look the way I wanted.  I used 2  3-yard spools of ribbon.


Here is our front porch all freshened up.  I spray painted our pot red and got a new rug from Ikea. We also have grapevine ball lights around our front door.  It looks so pretty lit up at night. 


This is our front garden.  I'm not a huge gardener but I'm really happy with the way our front garden looks.  I have been putting in new plants for a few years now in hopes it would eventually look like a cottage garden.  Most of the flowers are perennials that come back every year.  I like to fill in the small empty spots with annuals like petunias and marigolds. 

I think all I have left to the front is adding a cushion to the bench on the porch and maybe a few other pots of flowers.  Those are projects that will be coming up.  


Quick organizing in laundry closet

You know how you visit some blogs and see amazing makeovers.  Yea, this isn't one of those posts.  This is a practical nitty gritty type post.  I did a little reorganization in my little laundry closet.  


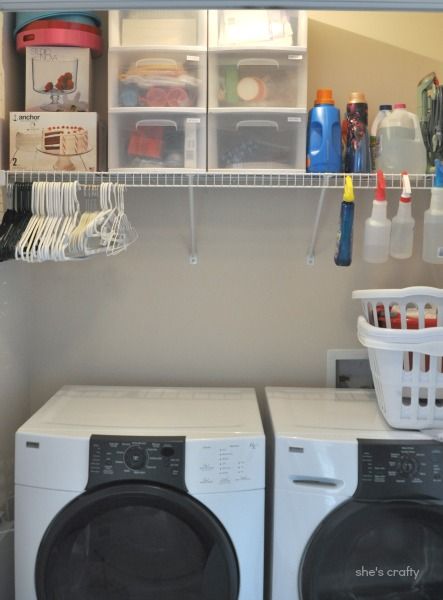
It's not beautiful, but it's very functional!


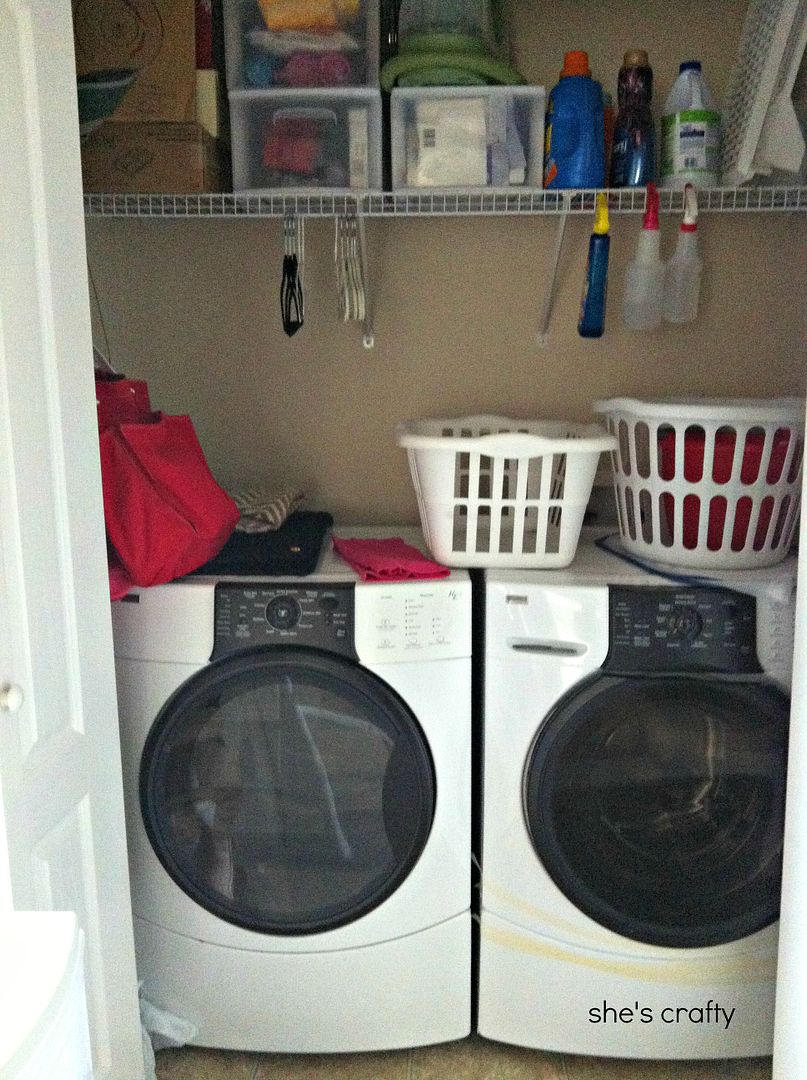
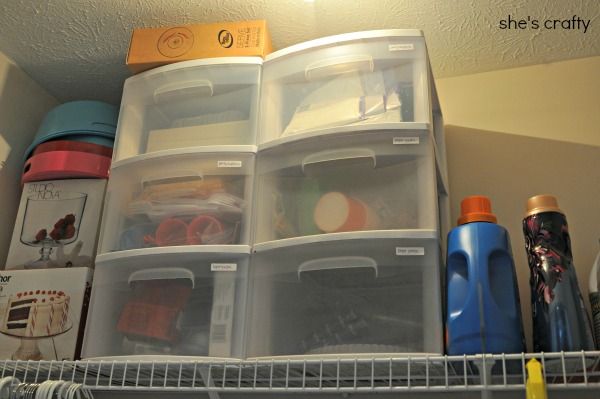
Our laundry closet is one of those places that we use all the time, but we hadn't given much thought to how it looks and we hadn't really done much to change how it functions.  I threw some stuff up on the boring builder included shelf and that's about it.  The shelf is really high and I'm not tall so I can barely reach anything.  (Don't you think the masking tape on the bottom of the washer is an especially nice touch? It was rattling during the spin cycle and making me crazy so I fixed it.  If you can call that fixing!  HA! )


Last week I tore my craft closet apart (AGAIN- new post coming soon) and put in new shelving which left a bunch of plastic drawers unused.


So I grabbed those unused drawers and put them in my laundry closet.  I now have a place to store and easily grab paper products, light bulbs, party supplies, etc.  


The most important thing I did was label each drawer so we know what's in there.  


Getting this space beautiful is on my to-do someday list.  But at least it's functional for today!

Hand Painted USA sign and a blog hop

I've been working on some fun signs.

One of my favorites is this hand painted USA sign.


I started with a really big piece of thin plywood that I painted white using latex paint.


It's always fun to have a little helper painting too!


While the white paint was drying, I hand drew (using a map as my guide) the United States onto the back of some contact paper.


Then I cut the USA out of the contact paper. That is when I figured out that I messed up. I should have drawn the map on the front of the contact paper. Doh!!


So I used the backwards map as a stencil and very carefully painted around it.


I was afraid the stencil wouldn't work, but it did. I then sanded the entire sign down. I love the shabby look!


For a little added sparkle I used glossy accents (amazon link) to add a star in the general area of Tennessee where we live.


Then I sprinkled a little bit of glitter onto the star. I love this glitter!!! It's very fine and so pretty!


I love this map! I think it will be so fun to decorate with for Independence Day!

Oh wait, the fun doesn't stop here, I have teamed up with some of my favorite bloggy friends to bring you:

7 Blogs
7 Projects
and
7 Times the Fun
All centered around the 4th of July!

Have fun checking each project out!


Pin It!

1. Melissa of Hollyhocks & Honeybees
2. Emily of The Benson Street
3. Candice of She's Crafty
4. Ashley of flats to flip flops
5. Adrienne of Free Time Frolics
6. Andie of Maybe I Will
7. Kaylynn of Among the Young


Linking up to Tatertots and jello, little inspiration, Be Different Act Normal, Six Sisters Stuff, Your Home Based Mom, the 36th Ave, Shabby Creek Cottage, Whipperberry, the Shabby Nest, DIY show off, Today's Creative Blog, Lollyjane, Jennifer Rizzo