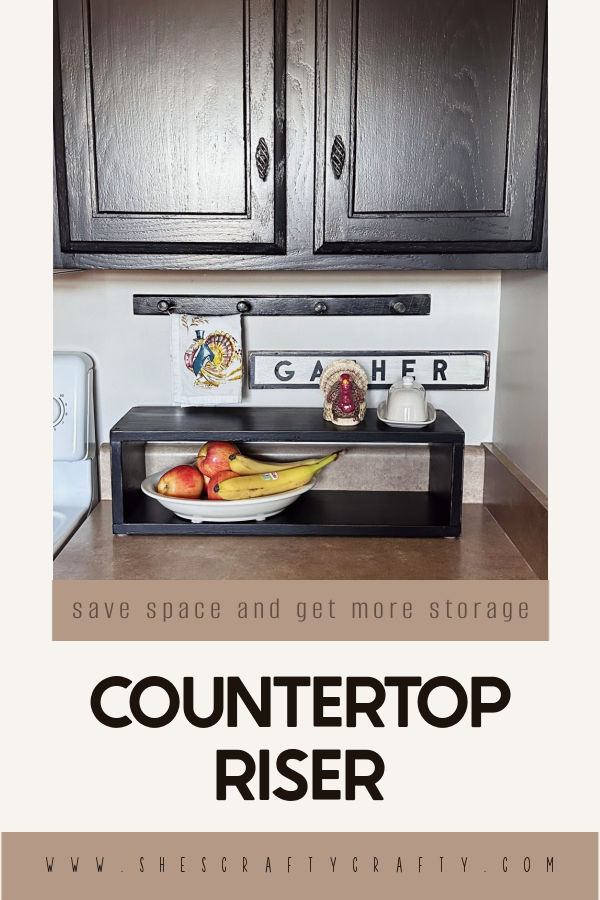
If you're looking for a way to create more space on your kitchen countertops, you can make a Countertop Riser.
this post contains affiliate links
It is already November so that means Thanksgiving is on the horizon, followed quickly by Christmas. This is the time of year that our kitchens get the most use. And one thing that is always in short supply in a kitchen is counter space.
This is especially true in my house which has a pretty small kitchen and very limited counter space. So this year, I decided to maximize the space I have by making a riser to add storage and save space on my counters.
How to Make a Kitchen Countertop Riser
Gather Supplies. You could make a riser from just about any length and width of wood. I found a bunch of 1 x 8's in my garage that were left over from various other projects, so that's what I decided to use.
Cut Wood. You want your pieces of wood to be exactly the same size so the riser is square. So stack them on the saw platform and cut them at the same time. For my riser, I cut the top and bottom pieces to 22.5 inches and the sides are 5.5 inches.
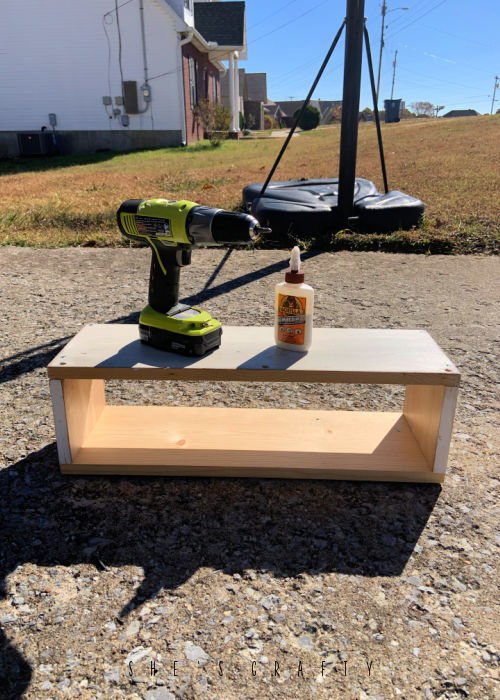
Glue Wood Pieces into Rectangular Shape. Use wood glue to attach the wood pieces together. I always use wood glue at each place the wood touches. This part of the process is kind of tricky because you have to hold one side while you're attaching the other side. So use whatever brace you can to hold it. Or get a trusty assistant to hold one side while you do the other.
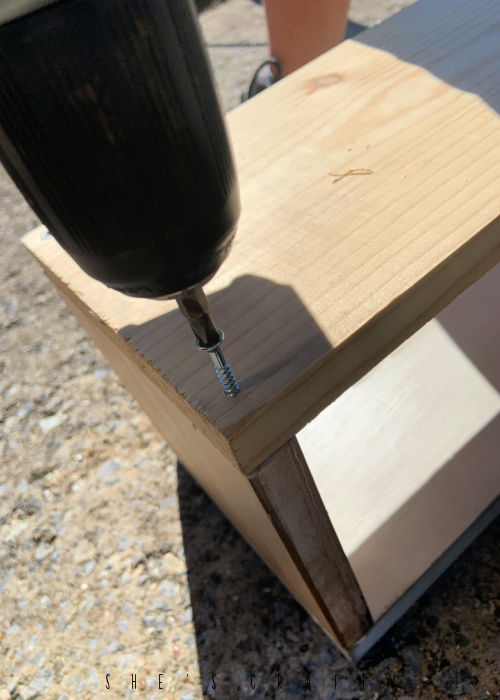
Attach Wood with Screws. To make the hold secure while the glue is drying, attach the wood pieces with screws. Make sure to drill pilot holes before using the screws or the wood will split. Drill the holes slightly smaller than the size of your screws.
Between the wood glue and the screws, the wood pieces are very securely attached to each other and shouldn't be wobbly at all.
Paint and Sand. Once the riser is put together, give it a coat of paint. Since my kitchen cabinets are black, I painted my riser black as well. I have been using chalk paint a bunch lately because it's easy to use, aka requires no priming, and gives the matte finish that I love. Once the paint dries, distress the edges with a mouse sander. Then apply a coat of polyacrylic top coat.
At this point, you could put feet or legs on the riser. I opted to just apply felt pads to keep the riser from scratching the countertop. I also applied felt pads to the fruit bowl to make sliding the bowl in and out of the riser easier.
I hung a small thrifted peg rack above the riser and a small Thanksgiving sign. I hung a turkey tea towel on the peg rack and placed a vintage turkey on top with our butter dish.
Making a Kitchen Countertop Riser gives extra space and adds a bit of style to your kitchen countertops.


.jpg)
.jpg)