Showing posts with label crafts. Show all posts

Girls Camp Craft: Look Unto Christ Stitching

If you are looking for craft ideas for Girls Camp, you will love this simple one.  It is a Stitching Card of Look Unto Christ.  


Look Unto Christ Stitching Girls Camp Craft.


this post contains affiliate links


As I have stated here and here, I was in charge of crafts at this year's Girls Camp.  Our theme was Look Unto Christ in One Direction.  I thought making a stitching of that theme would be a perfect reminder for our Young Women to remember where to look for comfort.  In a week filled with hiking, devotionals, and laughter, this quiet creative time gave the girls a chance to reflect, connect, and create something deeply personal and spiritually uplifting.

Look Unto Christ Stitching Camp Craft


Look unto Christ stitching Girls Camp Craft.


Our camp logo was a magnifying glass so that is what I designed this stitching to be.  I wanted it to remind the young women that they can Look unto Christ in everything.

Supplies to Make Look Unto Christ Stitching


Look Unto Christ cardstock stitching card for girls camp craft.


Instructions for making Look Unto Christ Stitching

As I said here, we had to change our plans due to weather, so rather than do the craft as a group, the YW did the craft in their cabins with the cabin moms.    


How to start Look Unto Christ stitching.


Take a piece of floss and thread it onto a needle.  You can use a needle threader if needed.  Poke a hole on the front of the card, where you want the stitches to start.  Pull the needle out and stick in into the hole from the back.


Tape the thread to the back of the card to keep it from pulling out.


Gently pull the floss tightly leaving about an inch on the back of the card.  Use scotch tape to secure the floss to the back of the card.


Look unto Christ stitching for girls camp.


Use a straight stitch to cover any of the card with floss.  You can do the shape of the magnifying glass and the letters. If you run out of floss, tape the end on the back side and then start all over again with a new stretch of floss and resume stitching.


Look Unto Christ stitching.


Continue stitching until you have filled the card as much as you'd like.  When you're finished, tape the end of the floss off.  When you are done, you can frame the card.  

So the girls were able to do their crafts on their own, I made instructions for each of the crafts we did at Girls Camp this year.


Instructions for Look unto Christ Stitching.

We encouraged the girls to place their stitching somewhere they’d see them often—on their wall, a bulletin board, or even their bathroom mirror—as a reminder that Christ is always there, inviting us to look to Him.

This small, quiet craft reminded all of us that looking to Christ doesn’t have to be complicated. It can be a quiet moment, a small act of faith, or a stitched phrase that reminds us of where our strength truly comes from.  If you're planning a girls camp or youth activity, I highly recommend a stitching project like this Look Unto Christ Stitching.  It’s creative, peaceful, and allows for testimony-building in such a natural way. And most importantly—it keeps hearts and hands focused on Christ.


If you like this post, you'll also like:


Backpack charm girls camp craft.


Jesus and Me girls Camp craft.


Affirmation Stones Girls Camp Crafts.


Girls Camp: Backpack Charm

If you're looking for a fun craft to do at girls camp or with any group of teens try making Back Pack Charms with Animals.


Girls Camp Craft- animal backpack charm.


this post contains affiliate links


There’s nothing quite like the creativity and connection that happens at girls camp. As I stated here and here, I was in charge of crafts this year at Girls Camp.  We were going to do our crafts all together but unfortunately had issues with severe weather so the girls stayed in their cabins with their cabin moms and we took the craft kits to them.  This craft was one I was super excited for because I figured it would appeal to a wide variety of interests and skill levels.  


Animal Backpack Charms

We all enjoyed crafting our own backpack charms using beads, bright colors, and adorable animal shapes! Whether it was a sleepy sloth, a sparkly dolphin, or a forest fox, every girl brought her own personality to the project—and walked away with something uniquely hers.


Animal backpack charm.


Supplies Needed for backpack charms

How to Make Backpack Charms


animals for backpack charms.


I gathered a wide variety of plastic animals.  I wanted to have a bunch of different ones.


how to put eye hooks in plastic animals.


To make the craft slightly easier once we got to camp, I previously added the eye hooks to the animals.  To do this, I used a big nail to tape a hole in the top of the animal and then screwed the eyehook in.  It took a long time to do 150 of the animals but it was totally worth it when we go to camp and they were all done.


Feed craft lace onto hook in top of animal.


Feed about 15 inches of craft lace onto the eye hook.


Place beads onto craft lace on animal backpack charm.


Once you've placed the craft lace through the eyehook on the animal, place the ends of the craft lace together and feed large hole beads onto the lace.


Use a lanyard hook tied onto craft lace on animal backpack charm.


Once it's all beaded, thread the craft lace onto a lanyard hook and tie it several times to hold it.  Trim the ends of the craft lace as needed.


Animal Backpack charm.


Crafting Animal Backpack Charms at Girls Camp was more than just a fun activity—it became a meaningful way for the girls to express their creativity, build friendships, and leave camp with a keepsake full of memories. Watching each charm come to life, from silly sloths to colorful cats, reminded us how small projects can spark big joy. Whether clipped to a backpack or hung in a room, these little animals will carry a piece of camp with them all year long.

If you liked this post, see:


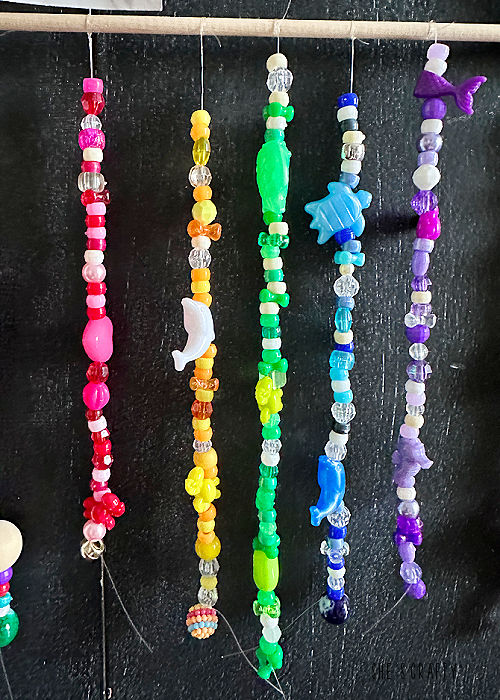
Beaded Wind Chime YW Camp Craft.


YW Camp Craft Ideas.


Girls Camp Craft- affirmation stones

Here is a simple craft that you can do with your Young Women at Girls Camp or with any youth group summer camp Affirmation Stones.


Girls Camp Craft- affirmation stones.

this post contains affiliate links

A few weeks ago I went to Girls Camp with the Young Women age 11-18 years of my ward and my stake since I am in the YW presidency of my ward and was on the Stake Camp Committee.  I was directly involved in planning our Stake Camp this year.  

This year's youth theme is Look Unto Christ.  So our spin on that was Look Unto Christ in One Direction.  We had so much fun with this theme using some of the songs from One Direction.  I will talk about this more in a future post.  

Young Women Camp Crafts


One of my duties this year, like in years past was to plan and carryout crafts for all 150 yw that attended camp.  I love this job and spend hours searching for just the right crafts.  This year we made 
  • affirmation stones
  • back pack charms
  • Jesus and Me figurines
  • Look unto Christ stitching


Affirmation Stones

Affirmation stones girls camp craft.


At camp this year, one of the most meaningful (and surprisingly simple) activities we did was creating affirmation stones. What started as a craft with a pile of clear glass pebbles and some printed affirmations turned into something deeply heartfelt, encouraging, and even healing. These little stones carried big messages—and became quiet reminders of truth and positivity for the girls to take home.


The idea was simple: use stones to remind each girl of their divine worth.  They affirming words or short personal phrases like “I am enough,” “I am loved,” “I believe in myself".  They could make them for themselves or to give away. We reminded the girls that their words have power—and when they’re used for good, that power multiplies.


Supplies used to Make Affirmation Stones


Instructions for Making Affirmation Stones

Affirmation Stones are a cost effective craft as well.  Each girl got the supplies to make 5 different stones.


Clear glass pebbles to make affirmation stones.


Clear glass gems are the little gems that are used in flower vases and can be found just about anywhere.  I was able to find them at Walmart for a really budget friendly price.  Just make sure to use the clear flat ones for this project.  
  

Punch out circles with affirmations.


Use the 3/4 in circle punch to cut out 5 circles.  I had the affirmations pre-printed in cards on white cardstock.  I left several circles blank in case anyone wanted to make their own affirmation.


Use mod podge to attach paper affirmation to clear stone.


Once the affirmation is chosen and punched out use mod podge to attach it to the clear stone.


Use mod podge to attach paper affirmation to clear stone.


Use a paint brush to put a tiny bit of mod podge onto the paper on the writing side.  Then place the clear stone on top.  The mod podge goes on white but dries clear.
 

Use magnet tape for affirmation stones.


I cut the magnet tape into small squares that would fit on the back of the stone.


Use magnet tape for affirmation stones.


The magnet tape is self adhesive.  After the mod podge dries, take the backing off the square of magnet tape and stick it to the back of the affirmation stone. 


Affirmation stone- girls camp craft.


This wasn't just a craft—it was a ministry. It was a way for the girls to internalize truth and even extend it to others. If you’re looking for a camp activity that’s low-cost but high-impact, Affirmation Stones are it. They’re easy to create, meaningful to keep, and powerful to give. And sometimes, the simplest activities leave the deepest impression.


Instruction sheet for making affirmation stones.

We planned to do the crafts together as a group.  Half of the camp would go on a hike and the other half would do craft and then switch the following day.  Unfortunately the weather didn't cooperate and the hike was cancelled.  We expected severe weather, so we made the decision to keep the YW together in each of their cabins.  Luckily we had instructions for each of the crafts so they were able to do the crafts with their cabin moms.  We took the supplies to each cabin and let them self run them.  

YW camp is such a intense experience.  We pack A LOT of activity and information into a short period of time but it is so beautiful to watch the YW grow in their testimonies and their friendships with one another.  


Ideas for YW Camp Crafts

Are you looking for ideas for Young Women Camp Crafts?  I have 5 ideas for camp crafts and how to do them easier and on a budget.  


How to do YW camp crafts the easy and budget way


Decorative Rope Rainbow on a budget

If you're looking for a cute little decorative project to make with your kids or youth group, that doesn't cost a lot, make this Rope Rainbow.


Decorative Rope Rainbow on a Budget- pinterest pin.


Best Crafts of 2019

If you love crafting, DIYing and saving ideas on Pinterest for your next project, then this is the perfect post for you! I've collected the top craft and DIY projects of 2019 from 15 talented bloggers for you to check out and I know you won't be disappointed.


Find the best crafts of 2019 all in one post!  There are so many great projects that you won't be able to pick just one.

How to make a Personalized Pillowcase using a Stencil

Looking for a way to personalize a pillowcase for custom bedding or a fun gift?  Don't miss these instructions to make a Personalized Pillowcase using a Stencil for any bed and any person!


how to make a personalized pillow case with a stencil

How to color Rainbow Rice for a table centerpiece

I'm always looking for fun projects that won't break the bank.  This one definitely checked both of those boxes.  How to Dye Rainbow Rice for a Table Centerpiece using items in your pantry.


How to dye rainbow rice with items in your pantry  |  Color rice in rainbow colors for a fun table centerpiece  |  She's Crafty


About Me

Hi, I'm Candice!

Woman with brown hair and polka dot shirt.  She's Crafty.


I am a wife and mom to 3.  

I am a crafter and journaler, a laugher and builder, a DIY'er and giver, and wanna be interior designer.  


I am an organizer and a party planner, a junk food eater, a deep thinker, a lover, a junker and a photographer.  I am a creator!


I am learning to be intentional with my time and talents.  I am on the path to Crafting a Creative Life


Being creative is using each of our God given talents to make the world a better place.


I hope at She's Crafty you are inspired to CRAFT your life to be what you want.  You don't need a lot of money.  You don't need a lot of time.  You just need a desire to CHOOSE something new.

Maybe one of my posts will help you want to choose new thoughts about meal planning, self care or fitness, choose new paint colors, choose a fun party for your child, choose to organize the drawer that won't close, or choose new pillow covers.


Woman with brown hair and polka dot shirt.  She's Crafty.


The best knowledge is shared by those who know and those who have done.  I love sharing things as I learn and do them.  We can help each other along the way to Create and make this world a better place!


The Best Crafts of 2018

Today I'm here to share with you THE BEST CRAFTS OF 2018 from your favorite bloggers!


Red White and Green Christmas Tree Felt Garland

Today I have an easy and inexpensive project to help you decorate your Christmas Tree-

A red, white and green felt Christmas Tree Garland

red white and green felt Christmas Tree Garland

Handprint Christmas Tree skirt

Christmas always makes me nostalgic!
I am reminded of all of the Christmas's that 
I have celebrated with my sweet kiddos.
I think of the twinkle in their eyes
and smiles on their faces
as we have made years of memories!

One thing that helps me mark the years
is our Christmas Tree Skirt 
with  my kids' hand prints.


child's handprint Christmas tree skirt

Easter Table Setting and Decorations

Hey friends!  It's Easter week.  Have you given any thought as to how to are going to set your table?  I have a very simple Easter Table Setting that can be easily duplicated.


Easter table settings and decorations- Use neutral colors and chalkboard paper to decorate your Easter Table

Favorite Decorating and DIY tools


Do you have tools that you use over and over again 
when crafting or decorating?
I do, for sure.

Today I'm sharing my favorite tools for decorating, crafting and DIY.

tools for decoration and DIY


Superbowl cupcake toppers

The big game is coming up this weekend.  
Are you ready to watch some football?

I'm totally ready to eat and watch the commercials!
I will for sure be making cupcakes with

S u p e r b o w l 
Cupcake Toppers 

Instructions to make Cupcake toppers for The Superbowl